As with most DIY projects, the key to a successful floor tiling project lies in the preparation. If you have a subfloor that’s uneven or bumpy, this will need to be correctly levelled before you start tiling. After all, porcelain tiles are rigid and not very forgiving, unlike softer coverings such as carpets and vinyl.
This is where floor levelling compounds come in. With just a little know-how and the right tools, they can be used to quickly create a smooth and level surface that’s perfect for your beautiful new floor tiles.

What are levelling compounds?
Sometimes called self-levelling concrete, levelling compounds are designed to be poured over uneven floors, to provide a flat and level base for tiling. They’re essentially a polymer-modified type of cement with high-flow characteristics and are designed to cure quickly, so there’s minimal delay to your project.
Levelling compounds aren’t usually designed to be a ‘final wearing surface’ and should be covered with tiles, vinyl or another suitable material.
What substrates can self-levelling compounds be used over?
Most levelling compounds can be poured over a variety of surfaces, including concrete, timber, screeds and existing tiles.
Although the existing floor can be uneven, any other irregularities - such as bounce in a plywood floor - must be rectified before levelling compound is applied, otherwise you run the risk of failures further down the line.
Can self-levelling compounds be used with underfloor heating?
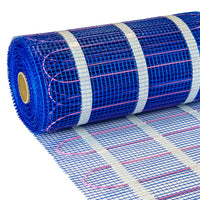
If you’re looking to incorporate electric underfloor heating mats in your new room, it’s best practice to encapsulate the heating wires in a layer of levelling compound. Not only does this make tiling much easier, it helps to protect the wires from any damage during the installation.
What is the maximum depth of levelling compound?
The minimum and maximum depths that you can apply levelling compounds vary from product to product. For example, with our high-performance LevelFlex+ DEPTH compound, you can apply anywhere from 2mm - 85mm in one application, without the need for further aggregate to be added to the mix.
How much levelling compound is required?
Coverage does vary between levelling compounds. As a guide, one 20kg bag of Level+ DEPTH will cover 4.5m2 at 3mm thickness. This means that if your room measures 3m x 3m and you need to cover a depth of 6mm, you will need four bags.
You can use the spirit level to help you decide what depth is required. Place the level at various point around the room and measure the dips between the level and the subfloor below. You will need to ensure the deepest dips will be completely filled.
How to use self-levelling compounds
Levelling compounds are straightforward to use. As well as the compound itself, you will need the following tools:
- Mixing bucket
- Drill with paddle mixer attachment
- 2m spirit level
- Flat trowel
- Steel ruler
- Expanding foam
- Primer and roller
- Safety goggles, gloves and knee pads
- Soft brush and dustpan
- Spiked roller
Prepare your floor and room
- Make sure your substrate is dry and thoroughly clean
- Brush up any dirt or dust and clean existing tiles or vinyl flooring using Grimex
- Use the expanding foam to seal any gaps between the floor and walls
- A wooden batten can be temporarily fixed across doorways, for the same purpose
- Almost all substrates should be primed to help improve adhesion and working times
Mixing levelling compound
- Wear the safety equipment and mix outdoors, where possible
- Refer to the manufacturer’s guidelines to ensure the correct quantities of water and compound are mixed
- Always add the levelling compound to clean water and slowly mix using the drill and paddle mixer
- Mix to a smooth, lump-free consistency
- Work in small batches as levelling compounds can cure quickly
Applying levelling compound
- Start at the point of the room that’s furthest from the doorway
- Pour levelling compound over the floor - make sure to overlap and blend between batches
- Use the flat trowel to spread the compound to the required depth and work into corners
- Work across the room and back towards the door
- Try not to overwork the compound - any trowel marks will disappear after a few minutes
- For deeper applications, you can use the spiked roller to help smooth the compound and remove trapped air
Levelling compounds usually cure very quickly, so tiling can often begin the same day. Before starting to tile, it’s best to check that the floor is now sufficiently flat using the spirit level - any dips between the floor surface and the bottom of the level must be no more than 3mm.
When the compound is fully cured, you can now begin to tile. Please refer to our How To Tile a Floor guide, for further information.
