It’s no surprise that we’re often asked by customers if you can lay tiles onto vinyl. After all, vinyl flooring was extremely popular - before the many advantages of porcelain saw tiles take over.
As with many renovation queries, the answer is… “it depends”. This article will take you through what you need to know.

What are vinyl floors?
Vinyl floors are a synthetic material, made from PVC and fibreglass. Durable and relatively easy to install, they became a popular flooring choice, especially for DIY projects.
However, since they contain toxic chemicals, many homeowners prefer to replace their existing vinyl floors with non-toxic porcelain tiles.
Can I tile directly over vinyl floors?
If all your current vinyl floor tiles are well-glued to a stable concrete base, then you’re in luck. You can tile straight onto your vinyl, saving you a good deal of time and expense. Here’s how:
- Re-attach any loose vinyl tiles
- Brush up any dust or dirt
- Use Power Stripper to degrease and clean the vinyl surface
- Brush the vinyl surface with a slurry mix of Prime Plus.
- To make this slurry, mix equal parts water and primer together and add approximately 30% by weight of porcelain tile adhesive.
- Once the primer is dry, you can tile as normal.
You may find this article on installing porcelain floor tiles useful.
Laying tile backer board onto vinyl
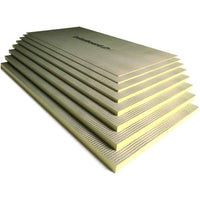
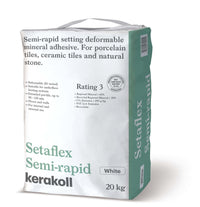
If your vinyl tiles are in good condition, you can lay tile backer boards directly onto them using our Tilemaster Rapid Setaflex adhesive. Follow the steps outlined above, including the Prime Plus slurry mix.
What if my vinyl tiles are in poor condition?
If your existing vinyl tiles aren’t looking healthy, we’d advise against tiling directly onto them. You could experience issues further down the line, such as grout coming loose or tiles cracking. Instead, you’ll need to remove the vinyl tiles and the adhesive underneath.
How do I remove my old vinyl tiles?
Removing the vinyl is usually quite straightforward, but not necessarily easy. You’ll need a heat gun or hairdryer to warm the vinyl
- Begin by warming a joint between two tiles
- Run the blade of a Stanley knife along the joint, and lift one tile up
- Now, use a floor scraper to lift each tile one by one
- Scrape away as much adhesive as you can
- With plenty of elbow grease - with a little luck on your side - you should be able to remove the vast majority of the residual adhesive, leaving you with the original concrete slab.
- Clean and vacuum the concrete slab, to remove any dust or dirt
- Seal the concrete surface with Prime Plus, diluted with 3 parts water
- Once the primer is dry, you can tile as normal using a high quality adhesive such as our Tilemaster Rapid Setaflex adhesive.
- We’d recommend using a scraper with a long handle to remove the vinyl adhesive. Take it from us, your back and knees will thank you!
If you can’t remove all the vinyl adhesive
If you’re unable to remove some larger elements of adhesive, we’d advise applying a layer of self-leveller over the subfloor, to give yourself a solid, flat surface ready for tiling. Seal the concrete surface with a diluted solution of Prime Plus, before pouring the self-leveller.
Important things to bear in mind
If you do tile directly onto vinyl, please remember there will be some additional floor build up, due to the existing floor covering.
Some older vinyl floors may contain asbestos. If you suspect this to be the case, do not attempt to remove the flooring. Instead, you should install tile backing board over the vinyl, before tiling.
You can’t tile directly onto certain vinyl floors, such as floating LVT floors and cushioned vinyl sheets. These will need to be removed so that the original subfloor is exposed, prior to tiling.
