Today’s ceramic tile designs are so colourful, varied and beautiful that it’s easy to overlook the basics of trouble-free installation. These include selecting the right adhesives, grouts and tile trims: all topics we will cover separately.
In this article, we’ll discuss the vital importance of using tiling backer boards on your next project. It doesn’t matter what tile you choose - ceramic, porcelain or natural stone - if you don’t use the right substrate, or prepare it properly, you run the risk of compromising your beautiful new tiling scheme.
What are tile backer boards?
Traditionally, when tiling a floor or wall you would overboard the surface with either plywood or plasterboard sheets, respectively. And while these materials provide a flat surface to tile onto, they come with numerous disadvantages - they’re prone to water damage, movement changes in temperature.
Tile backer boards offer a wealth of advantages over traditional overbearing materials. Designed specifically for tiling projects, they can be fixed to walls and floors, offering a flat, stable and suitably rigid substrate for tiling onto. We offer two types of tile backer boards:
Cement Backer Board
The most common type of backer board, these are made from fibre cement and are ideal for over-boarding floors. Our 6mm thick cement backer board has the same strength as a traditional 18mm plywood sheet and measures 60 x 120 cm.
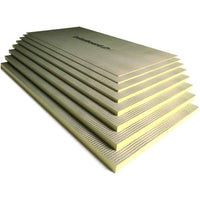
Delta Thermal Backer Board
Made from extruded polystyrene foam that’s coated in a fine layer of mortar, these backboards offer excellent insulation. They’re ideal both for waterproofing and in conjunction with underfloor heating systems. We offer sheets in two thicknesses and both measure 60 x 120 cm:
Why use tile backer boards?
Walls and floors are almost always never ideal to tile directly onto - for example, they may be uneven or porous. There’s a variety of reasons why you should use dedicated tile backer boards instead of traditional over-boarding materials, as they’re:
- Much thinner than plywood sheets, so if you’re overbearing floors then the step into the room is reduced
- Non combustible, so can be used as a substrate around fireplaces, if the correct board is used
- Resistant to water and mould, so can be laid in wet areas such as showers and won’t rot or swell
- Strong and stable, able to take much more weight than plasterboard and skimmed walls
- Perfect for use with underfloor heating systems, thanks to their excellent thermal mass
- Lightweight and easy to work with, so ideal for both the professional or DIY tiler alike
Furthermore, in 2018 British Standards were updated to advise that:
- Direct fixing of tiles to walls made from plywood is not recommended
- The use of sheets that are subject to movement from changes in moisture should be avoided
- Plasterboard, including moisture resistant sheets, is generally unsuitable for wet areas
Where to use tile backer boards
Tile backer boards can be used almost on almost any wall or floor. The most common applications include:
Stud walls.
Tile backer boards can carry far more weight than traditional plasterboard or plywood cladding sheets
Floors.
Both types of backer board can be used to overboard floors, providing a thin, stable and sturdy substrate
Showers.
Delta Thermal Boards can be used to clad floor and walls in wet areas, to create a waterproof substrate
Fireplaces. 12mm thick cement backer boards should be used as a substrate around fireplaces and log burners
Underfloor Heating.
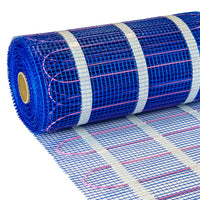
Fix Delta Thermal Boards underneath electric heating mats, to help improve the efficiency of your system
How to fit tile backer boards
Tile backer boards are relatively easy to fix, although the exact method does depend on the boards you're using and what you're fixing them to. That said, there's two things to remember:
- Boards must always be laid in a staggered fashion, so that four corners don't meet at a single point.
-
When fixing boards in wet areas, you must always use a tanking kit to seal the joints between boards.
Stud walls
- We recommend fixing 10mm Delta Thermal Backer Boards to stud walls
- Studs must be at 300mm centres or less
- All board edges must be supported by studwork or noggins
- Use 15 screws and washers to fix each board to the studwork
- Screws must be placed at least 20mm from the edge of the board
Solid walls
- We recommend fixing 10mm Delta Thermal Backer Boards to solid walls
- Prime the wall using Prime Plus
- Fix boards using our flexible Rapid Setaflex tile adhesive
- Dot and dab the boards to the solid wall, at 300mm centres or less
- Then, use screws and washers to mechanically fix into the solid wall
Concrete floors
- We recommend fixing 6mm Delta Thermal Backer Boards to concrete floors
- The concrete must be stable, fully cured and primed using Prime Plus
- Fix boards using Rapid Setaflex tile adhesive, with an 8mm notched trowel
Timber floors - 6mm Delta Thermal Backer Boards
- Prime timber floor using Prime Plus
- Fix boards using our flexible Rapid Setaflex tile adhesive
- Alternatively, use screws and washers to mechanically fit boards, at 200mm centres
Timber floors - 6mm Cement Backer Boards
- Run two beads of the cement backer board adhesive to the back of each board, then place to the floor
- Screw the boards into the timber floor using 8 screws per board
- Run a bead of adhesive along the edge of each board, before placing the next board
How to cut tile backer boards
As well as being straightforward to fit, both types of tile backer boards are easy to cut. As with cutting any material, it's always best to wear a mask.
Cement Backer Boards
- Straight lines can be cut using a carbide-tipped scoring tool
- Score the board two or three times, then snap over a block You can also use tile nippers
- For more complex cuts, you can use tile nippers or a circular saw with a PCD blade
Delta Thermal Backer Boards
- These can be cut with a stanley knife or saw.
- Always use a fresh blade, to ensure a clean cut
Do tile backer boards need to be primed?
We always recommend priming tile backer boards, to increase adhesion and adhesive open times.
Before priming, make sure the surface is clean and dry. Dilute one part of Prime Plus with 3 parts water and apply using a roller or sponge. Allow to dry.
How to tile onto tile backer boards
Once your tile backer boards are fixed in place and primed, they can be tiled as normal. Please refer to the following guides.
- For tiling floors - How To Tile A Floor
- For tiling walls - How To Tile A Wall
Please note that the joints between boards must always be taped and sealed, if you're fixing the boards in a wet area, such as a shower or steam room.
How much weight can tile backer boards support?
It's important to consider the weight-bearing capability of a substrate, particularly when it comes to tiling walls. The weight of a modern porcelain tile, including adhesive, can easily exceed the carrying capacity of a plasterboard or skimmed plaster wall.
However, our Delta Thermal Backer Boards have a much higher tile carrying capacity, of 50kg per square metre -more than double a skimmed wall. That's enough capacity to support almost all interior tiles.
